Upload Inventory Export Files to the Web Server
The "Universal" inventory web export feature of Shopkeeper can create export files in almost any format that a website manager should need,
and they are put into a folder on your computer's local drive.
See the Inventory Detail Website Export help topic for more details.
In order for the inventory information to get to your website's pages, your web manager needs to help you send or upload those files to the right place and the manager needs to process and import those files.
As indicated in the Inventory Website Export help topic, Shopkeeper puts the export files in the Inv-Web-Export folder which is in the VJS Reports folder on your computer's local storage drive. It's possible that you could email these files to your web manager, but it is more likely that they should give you instructions to use a FTP program to upload the files to your web server. With the FTP program you can also view and manage any files uploaded to your web server. E.g. you might want to remove a file if you know it needs to be replaced, or you may want to upload tens of thousands of image files. Well-known free or shareware FTP programs are FileZilla and WinSCP.
In addition to helping you configure these programs, your web manager should tell you the key information for uploading the files, so you can use other FTP programs if convenient. E.g. you need to know:
FTP Host Name - typically something like ftp.megasites.com or an IP address like 100.200.300.400
FTP User ID - possibly case-sensitive
FTP password - usually this is case-sensitive
FTP folder name for the inventory data file(s) - this might be / (forward slash) or blank if no special folder is needed
FTP Folder name for the inventory images
Whether SFTP (encrypted) is required. This is not currently supported, but could be if many people need it.
If you have the Shopkeeper Maintenance Plan, newer versions of VJS can, in one sequential set of steps, prepare your inventory data files and image files and then upload them with FTP to your website immediately afterward.
See the Maintenance Plan Code help topic for instructions on ensuring you can activate this feature.
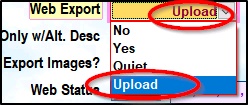
Then, when you choose the Web Export option from the Inventory Reports by Style screen, you can choose Upload instead of just Yes.
However, it is strongly suggested that you have an FTP program to let you view your uploaded files and, when needed, to upload files or remote them yourself.
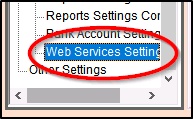
To add your FTP credentials to Shopkeeper, open Preferences from the Maintenance Menu and at the bottom of the list on the left, choose Web Services Settings, then click on Configure Accounts in the right-hand window.

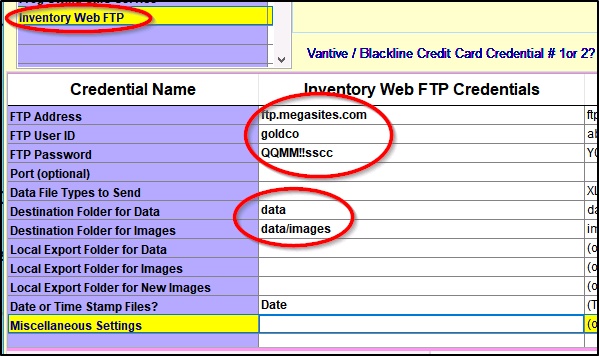
The essential credentials are the FTP Address (Host), the User ID and the password. The Destination Folder for Data could well be empty which would put your inventory data list in your "root" folder on the web server, or you could specify a folder name such as data . If you will be having Shopkeeper upload the picture files, it would be usual that they be put in a separate folder, perhaps images or a folder under the data folder such as data/images. Note that images will not be uploaded if you don't put a value here, so if the web manager really wants them to be put in the root folder, type in just the forward slash, / which indicates the root folder.
Local Export Folder for Data is an alternative local "staging" folder on your computer for the inventory export data files, instead of the default folder, Inv-Web-Export folder which is in the VJS Reports folder. This is expected to be almost never used but might be useful if you have two sets of books in Shopkeeper and want to keep the export files in separate folders, such as c:\export\retail or c:\export\wholesale.
That's because all these upload settings are specific to the set of books you are using (though almost everyone has just one set of books for one store.)
If you choose an alternative local staging folder for the data export file, then the local images stating folder would be a folder under that, unless you also specified a separate local stating folder for picture files. This is expected to be even less likely to be needed in most cases.
Whether or not to use the Date or Time Stamp Files option will require some thought, and discussion with your web manager.
It could be useful in cases where you upload inventory data fairly often.
By default Shopkeeper creates inventory upload files with the same name every time, such as InvStyleExport.XLS and InvStyleExport.CSV, etc.
That is often easy for the web manager to work with since they are looking for a certain file name every time. You upload it today and they process it and you upload a fresh version a few days from now and they look for the same file and process it then.
However, imagine the case where you upload today and tomorrow but the web manager (or their automated system) doesn't get around to checking your files
until tomorrow evening? In that case tomorrow's upload file would have replaced today's upload file and so today's upload file doesn't get processed.
If you add the word Date to the Date or Time Stamp Files box, then when Shopkeeper uploads your files, a date is added to the name. E.g. InvStyleExport.XLS could be uploaded as InvStyleExport-20221220.XLS on December 20, 2022. That way, if the web manager didn't check your upload folder for a few days, they could see a few different upload files waiting to process. They would, of course, have to process them in date order so that your latest file supersedes the earlier files.
If you were to upload a file at 3pm but then realized you needed to redo or correct the export again at 3:30pm, the later one would replace the earlier one for that day.
However, if you want to be able to send multiple different uploads on the same day, e.g. watches at 1pm and bracelets at 4pm, then you could enter the word Time in the Date or Time Stamp Files box, then when Shopkeeper uploads your files, a date and time stamp is added to the file name. E.g. InvStyleExport.XLS could be uploaded as InvStyleExport-20230115-1533.XLS on January 15, 2023 at 3:33pm. That way, even if your web manager's program checks your upload folder often,
at, say 4pm, it could see an upload file at 3:33pm and another one at 3:45pm.
The website's import program would have to process them in date and time order so that your latest file supersedes the files from earlier in the same day.
The Data File Types to Send option allows you to limit which inventory data file types are created and uploaded. By default upload files are created in Excel XLS format as well as CSV, XML and Tab Delimited and Pipe Delimited formats The web manager should be able to use just the one they want and ignore the others. However, if it's convenient, or just faster to send one file type alone, and if your web manager requests that you send just one file type, then you can type XLS or CSV or XML or TAB, or PIPE, or any combination of those, into this box in the Web Services Settings page of Preferences.
Uploading Picture Files
If you have thousands or tens of thousands of good-quality image files, the initial upload could take hours or even days and if you have Shopkeeper do that, it would block your use of Shopkeeper for a long while during this process. Therefore it is likely that such a large initial upload is best handled by a third party FTP program that your web manager can assist with. It could run in the background on your computer over the course of hours or days and can be stopped and restarted if the computer is rebooted or goes to sleep.
If you have a smallish number of pictures or if you have already uploaded most pictures on a previous date, then you might find it convenient to have Shopkeeper upload the new pictures at the same time the new inventory data file is created and uploaded. To do that, be sure that the FTP website picture folder is typed into your Web FTP Credentials - even if you have to put just a slash ( / ) to indicate they go in the website's root folder. See Optional Settings above for more details.
In order to export or upload pictures, you also have to select Yes or Just 1 or Just 2 for the Export Images choice from the Inventory Reports by Style screen.
 Shopkeeper allows you to store up to 36 pictures per inventory item and choosing Yes will include the first six of those for the export. If only the first one or two image files are needed for the website, then select Just 1 or Just 2.
Note that if you choose Yes or Quiet for the Web Export option, as well as the Export images option, then the images of the items included in the inventory export data file are put in the staging folder, as described above. however, if you choose to also simultaneously Upload the web export then the Shopkeeper pictures are not put in the staging folder. Instead they are directly uploaded from the original picture folder location. This is to save time because picture uploads can contain a lot of data and this avoids first copying them all from your in-house file server to your C: drive then uploading them.
Furthermore, only pictures which are missing from or are older on the web server are sent. E.g. if you re-uploaded your entire inventory but if 6100 of the 6200 pictures are already on your web server, then Shopkeeper would upload only the 100 missing pictures.
Note that this would require that your web manager leave your previously uploaded pictures in the picture folder on the web server. If your web manager's import processing routine moved the pictures to a different production folder and removed them from the upload folder, then Shopkeeper could not know which pictures
were already on the website, and in the example above, would re-upload all 6200 image files.