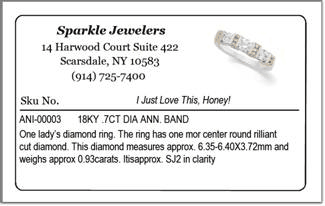
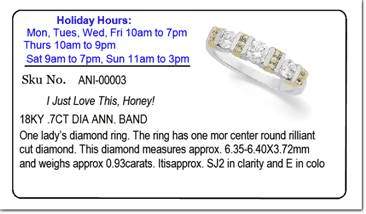
Handing your customers a Reminder Card any time you don't close the sale on the first visit will greatly increase the odds of making the sale at a later date.

(sample hint card for use on plain card stock - without price)
...
To print product cards:
Select an item from the Inventory Status screen

Then click "Print a Tag and then click "Print"

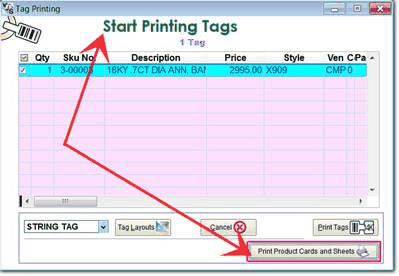
From the Start Printing Tags screen

Choose Print Product Cards and Sheets
... Optionally, before clicking, you can choose an extra Product Card Message. This option appears when you hover the mouse over the Print Product Cards button
![]()
You can also type a new message, and this will be added to the list of messages for future re-use. ...
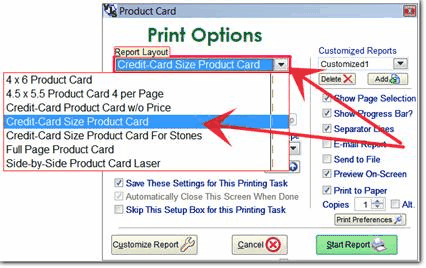
From the Print Options screen you can select the product card type. The Credit Card Sized Product Card and the one W/O (without) Price are common selections.

At this point we have to pause for some technical information.
1) Most printers do not support credit-card sized paper stock. Therefore, you may have to purchase a printer specifically for this purpose. At this time, the Canon IP100 is such a printer. It can also print on regular letter paper, but it's not designed for heavy usage so you might dedicate it for cards.
Some specialty card printers may also be compatible. That could be interesting if you want to print plastic or plasticized cards. ( contact Bill Belpanno at Kassoy for card printers)
2) After you select the basic layout, note that ** You Will Have to Create a Customized Layout **
This is because credit card size paper is not a standard size in Windows. Every compatible printer driver has its own unique paper-size ID for cards.
However, this will need to be done just once for each design you make.
From the print Options screen, choose Add, then type a name for your custom version

Then choose Customize Report
![]()
Then in the designer, choose Report, Properties
 ' Then Page Setup

Then set the paper size to Credit Card

While you are in the designer, you are free to make other changes such as moving or deleting text, changing fonts, etc.
That is generally for "technical" users, and is a bit advanced but not too scary if you have a few minutes, and besides, simple position and font adjustments are not complicated. See below for a primer.
This link has a guide on how to create customized versions of appraisals: and the same approach applies to repair envelopes, statements, receipts, reports, etc.
www.jewelryshopkeeper.com/help/vjs/manual/appraisal_video_instruction.htm
or shortcut: http://goo.gl/1rhJ
Once you're in the designer you can move objects by dragging with the mouse or for more precision, click once then use the cursor keys.

[Hint card without store name. This could print on the back of a business card]