Instructions for Appraisal Entry and Printing
There are separate instructions on *customizing* the appraisal layout here www.jewelryshopkeeper.com/help/vjs/manual/appraisal_video_instruction.htm
or via this shortcut: http://goo.gl/1rhJ
(However, you typically do not need to customize the layout since there are about 10 formats pre-made.
There are two main approaches to actually *entering* the appraisals into Shopkeeper.
1) For the appraisals you're providing as you sell an item, you add the item to the sale as usual and then click the Apprais button at the right side which will pop up the appraisal screen.

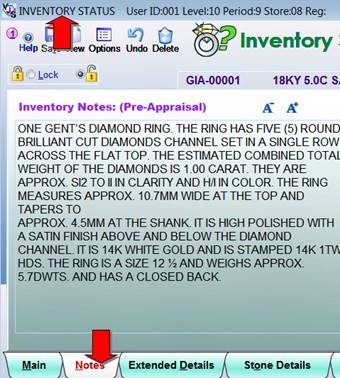
If you have pre-appraised the item by adding notes on the inventory item, then the appraisal screen will be partially or completely filled in.

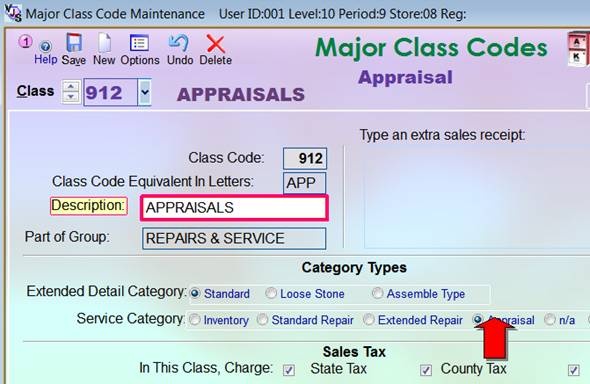
2) For appraisal service that you are providing for the customers own merchandise, first you make a major code for appraisals. This is very much like a repair major code, but you do want to specify "Appraisal Category." You also need to specify if the service is taxable or not.

This will create a dummy Sku number such as APP-00001 or 912-00001 which you will add to the sales screen.
As before you'll click the Apprais button on the sales screen after adding the Sku.
Aside from creating a customized layout using the Designer, there are several layout changes you can make
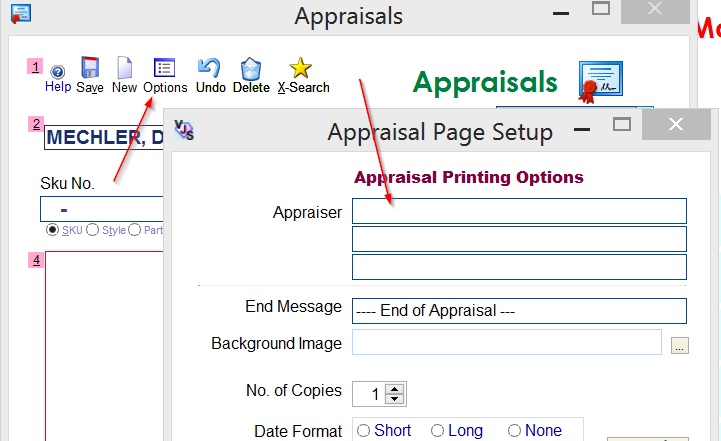
more simply by changing some basic options. At the top of the appraisal screen, choose Options, then
Appraisal Print Layout

Where you can change some of the wording. Note that you can create a few different
combinations here - either for different names or for different types of reports.
