Loyalty Points Configuration
Start by creating a major code dedicated for Points Redemption via the Major Class Codes screen on the Maintenance Menu.

Typically, miscellaneous major codes are put towards the end of the list. In this example, we'll use 980.
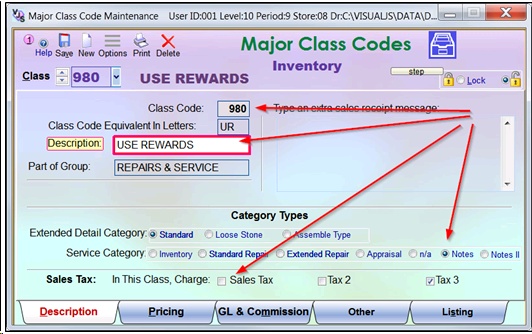
Note that the Service Category must not be Inventory because it should not deduct from quantity. A type of Notes is more suitable. Typically, using rewards should not be taxable so that applying $100 of rewards would deduct just $100 from the sale, not $100 plus tax.
However, if you consider it a discount of taxable merchandise, you could make it taxable so that $100 of rewards could reduce the sale by $107 (in the case of 7% sales tax.)
As with creating any major code, a dummy Sku ending in -00001 is created and you can use this for all redemptions of loyalty rewards.
In addition to a Points Redemption Major code, you might want to make a Points Adjustment Major code using the same Notes Service category and making it non-taxable. This can be used to make miscellaneous adjustments to a customer's points total.
* * * * * * * * * * *
Next open Loyalty Rewards Points Reports and Configuration from the Maintenance Menu.

and open the class Codes tab. Find the Use Rewards major code and set the Reward Code to R for Redeem.Set the Adjustments major code to type A. See the Loyalty Points Calculation and Reporting for more information on how to use Adjustments.
In most cases, where points are worth $1 each, you can leave the Percentage as zero. If you want points to be redeemed at a value of 10¢ each, set the percentage as 10.
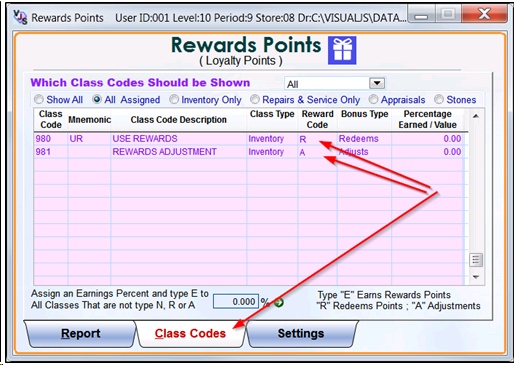
Any major code of inventory that should accrue points to the customer accounts should
be set to type E for Earns and a percentage should be assigned.

If you want to quickly set all (or most) major codes to earn points and to assign them all the same rate, fill in the rate at the bottom and click the green 'Go' button.
![]()
If you do this but a few major codes should be different, you can individually adjust those
major codes afterwards.

* * *
Next open the Settings page
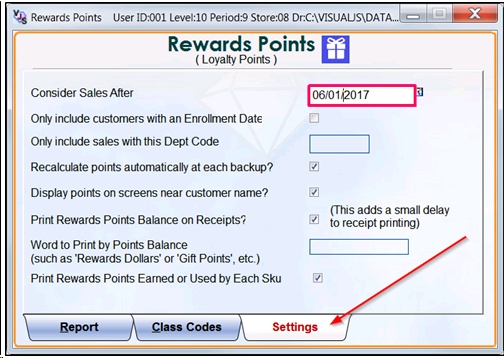
The Consider Sales After box can be filled in with the starting date of the loyalty program. This will apply to all customers and all eligible sales after this date will earn points - according to how the major class codes are set up.
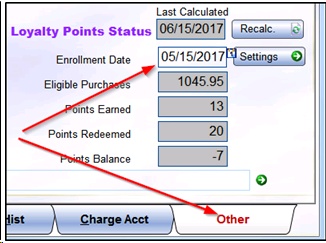
Alternatively, you can decide that only customers with their own personalized enrollment date will be enrolled and they will earn points only on sales on or after their enrollment date. To do that, check the box here,
![]()
and you will need to enter an enrollment date for enrolled customers on the Other page of the customer maintenance screen.
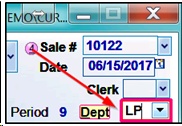
You can also decide that only certain flagged sales will be eligible to earn points. To do that, specify a certain sales Dept Code on the Setting page
![]()
and then apply that same Dept Code to the certain eligible sales.
* * * * * * * * * * *
You can optionally have the most recent bonus points tally show up in the Customer X-Tra Search Screen (in the customer details square at the bottom right corner), like this:
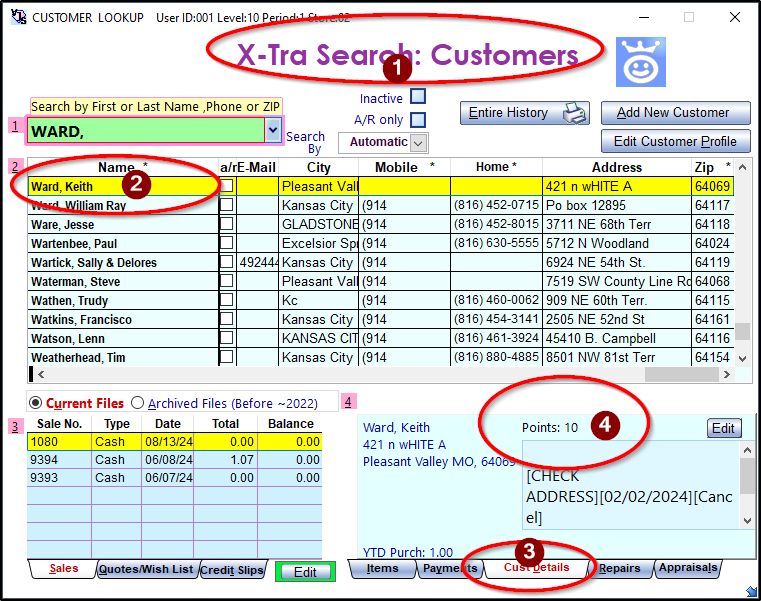
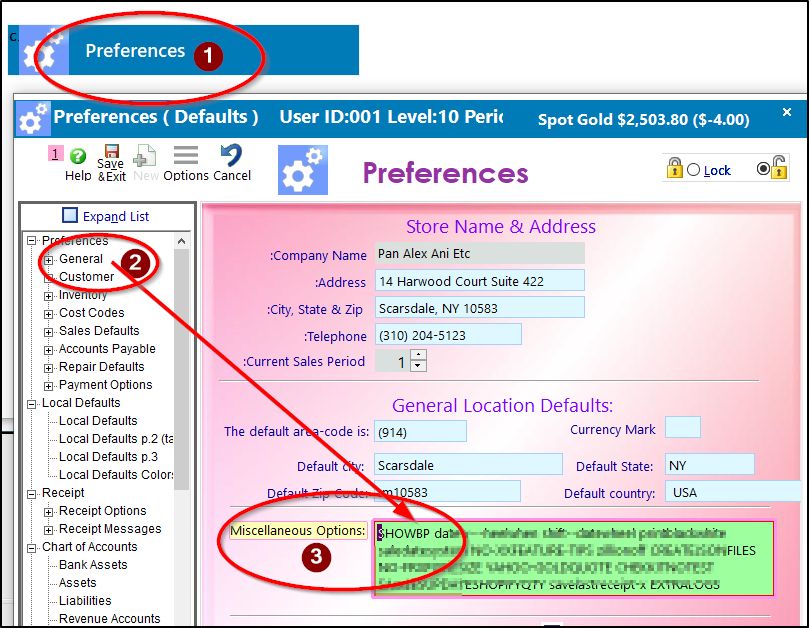
To do that add the keyword SHOWBP anywhere in the Miscellaneous Options box in the Preferences screen, like this:
